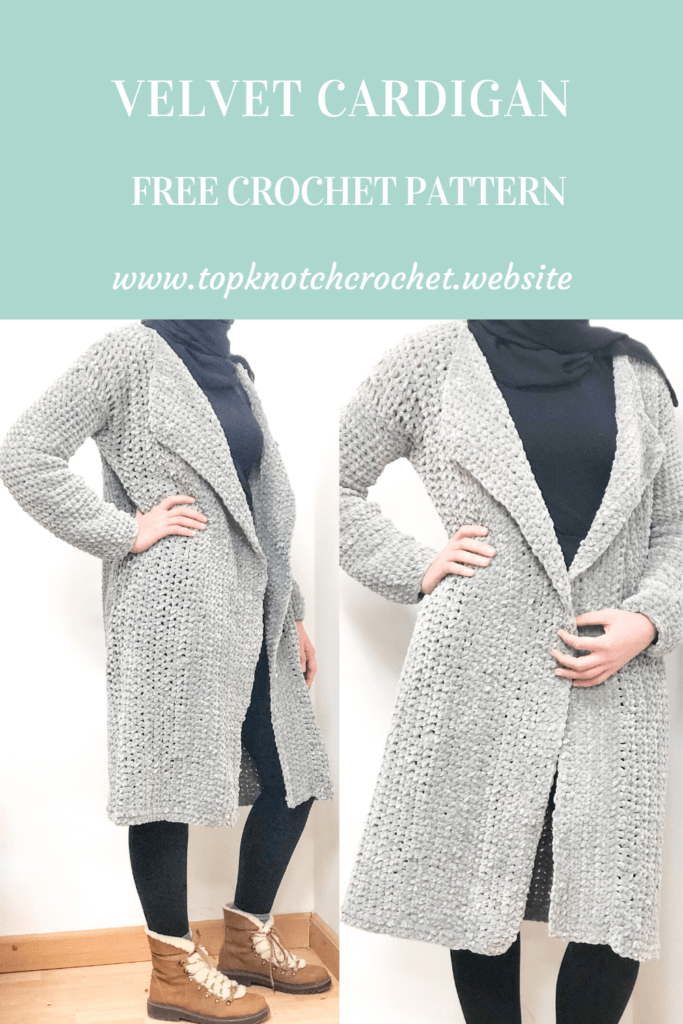
Hello everyone, As I promised in the previous blog post. the next few patterns are going to be in velvet yarn since I fell in love with it.
This Oversized Crochet Cardigan is my first attempt to make an adult garment pattern. That’s why I tried to make this pattern as simple as possible.
I planned to make this cardigan a comfy cozy lounge robe. Yet it turned out to be stylish enough to wear outside.
And as I loved crocheting with this velvet yarn. I loved wearing it and the way it felt on my skin.
Now lets talk a little bit about the pattern
The material you will need for this pattern are:
Disclaimer: This blog post may contain affiliate links. I may earn a small commission to fund my coffee drinking habit if you use these links to make a purchase. You will not be charged extra, and you’ll keep me supplied in caffeine. It’s a win for everyone, really.
- Yarn: 8-10 Skeins ( According to your measurements and the chosen length of the cardigan.) Super bulky (6) velvet yarn of the color of your choice. I used a locally produced yarn but I honestly recommend Himalaya dolphin yarn
- Hook: 9 mm
- Stitch markers, yarn needle to weave in ends. Here is a set with one of my favorite hooks sets along with stitch markers and needles
Size:
This pattern is mainly written with measurements rather than gauge
before starting you will need to take some measurements:
- The arm hole depth/length.
- The length of the cardigan: from the shoulder to the desired length
- Finally the cross back measurements as illustrated in the graph in number 4
- The front panel is going to be 2/3 of the cross back measurement so if the cross back is 50 cm each front panel is going to be 33.

To find out your Front panel measurements. Multiply your cross back measurement by 2 then divide the result by 3.
Skill level: Beginner
Abbreviations and Glossary (US Terms):
- ch – chain
- sc – single crochet
- hdc – half double crochet
- front and back post hdc
Notes:
- The whole body is worked as one piece.
- Then each arm is worked directly in rounds.
- The good news here is that there is no sewing in this oversized crochet cardigan pattern !! I love patterns that have minimal sewing and finishing instructions.
- We will start working with one side of the front panel then the back then the other size of the front panel.
Pin for later:

Pattern Instructions:

After measuring we will start with a chain of your desired cardigan length.
Row 1. Work SC in each chain.
Row 3. Chain one (Chain one is not considered as the first stitch throughout this pattern). SC in the very first stitch and all the remaining stitches
Row 4. Chain one and repeat the previous row at the end of this row your last SC will be in the first SC of the previous row. Not the chain one space.
If You don’t get the previous row.
Check this tutorial to get straight edges by the amazing Sewrella.
Continue with SC rows till the width of your front panel reaches your desired width. (The second measurement you took)
The back of the cardigan and shaping the arm holes
The next row we will continue with sc. But this time we are going to leave the desired centimeters for the arm hole. (The first measurement you took).
Now instead of SC we are going to chain a chain with the same length as the stitches we left
Notice that if you want an oversized look for the arms leave more cm for the arm hole.
Now we are going turn our work and do SC in each chain and stitch from the previous row.
This row marks the beginning of the back. So we are going to continue with SC rows till we reach the desired length of shoulder to shoulder. (The third measurement you took)
Now we are going to repeat the same process for the other arm hole. make sure the second arm hole is in the same direction as the first one.
After shaping the arm hole we are going to continue with the other front panel. When it reaches the desired length cut yarn and weave in ends.
shaping shoulders and working the arms
Now we are going to sew the shoulders area as illustrated in the drawing bellow.
Then we are going to attach the yarn as shown in the illustration. and work the arms in rounds with SC. But make sure that the right side of the stitch is the one that will appear on the right side of the cardigan.
Keep working in rounds till you reach the desired arm length. The easiest way to do this is trying it till you reach the desired length.
The last step in the arms we are going to decrease the circumference of the arm to make it more fitting on the wrist. to do that, we are going to do two more rounds. One round we are going to do 1 SC in the next two stitches then single crochet 2 stitches together. till you reach the end of the round. Repeat this for another round. But this time we are going to SC in the next 4 stitches, then single crochet the next two stitches together. Cut yarn and weave in ends.
Repeat for the other arm.
Now we are going to do a final finishing round of sc.
Attach the yarn at the top edge of the lose end of the front panel and start to do single one sc in each row around the neck. then down across the edge of the other front panel, then down across the bottom edge of the cardigan. finally go up again across the front edge of the front panel. When you reach the top slip stitch to the first stitch you have worked.

I hope you liked this pattern. If you made one, share it with me on Instagram. I would love to see how you adapted it and what variations you made 🙂


